This article explains how to setup an UI Automation framework using Cucumber
Let’s take a test web site
Kayak.com for Automation
Test Case – The script should search for Hotels in the city San Francisco and validates that a list of hotels is displayed
Automation script development steps
Cucumber Eclipse Plugin
- In Eclipse click on Help – Install New Software
▪Click on Add Repository
- Now Select the plugin displayed and Click on Next to install
BDD
▪ BDD is used to better understand requirements before project implementation and development, the outcome being better alignment of the development with the problem or the gap the software is aiming to solve
▪ Being proactive and understanding the working of the software in granularity helps prevent rework later thereby increasing code efficiency
▪ Is a Domain specific Language which helps in describing the behavior of the automated tests without bothering about the implementation aspects
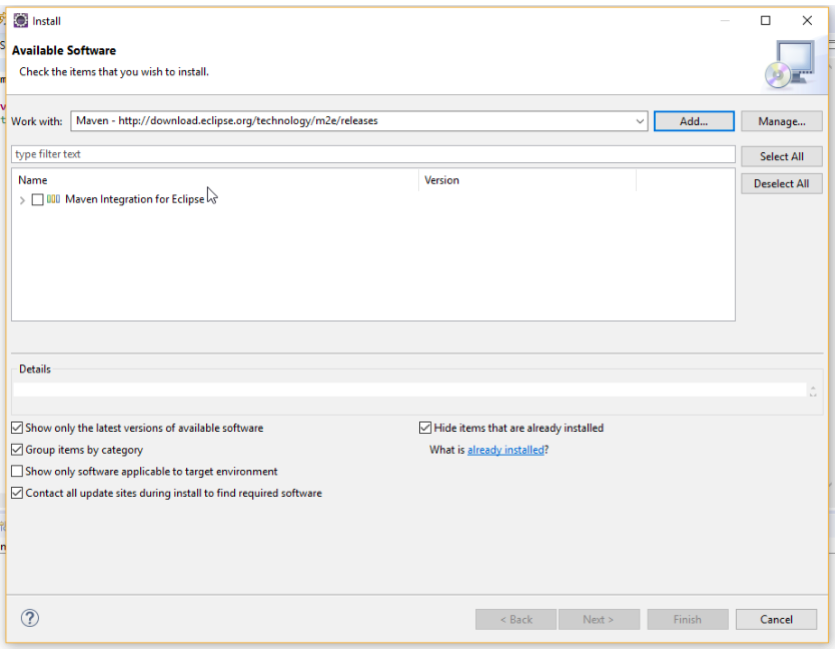
Eclipse Maven Plugin
- In Eclipse click on Help – Install New Software
▪ Click on Add Repository
- Click on Add
- Now Select the plugin displayed and Click on Next to install
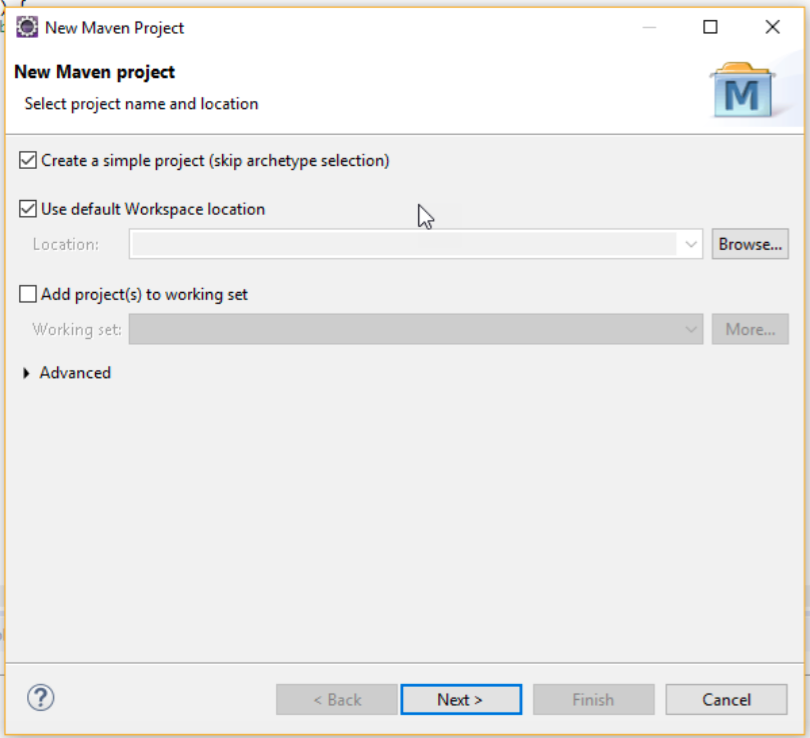
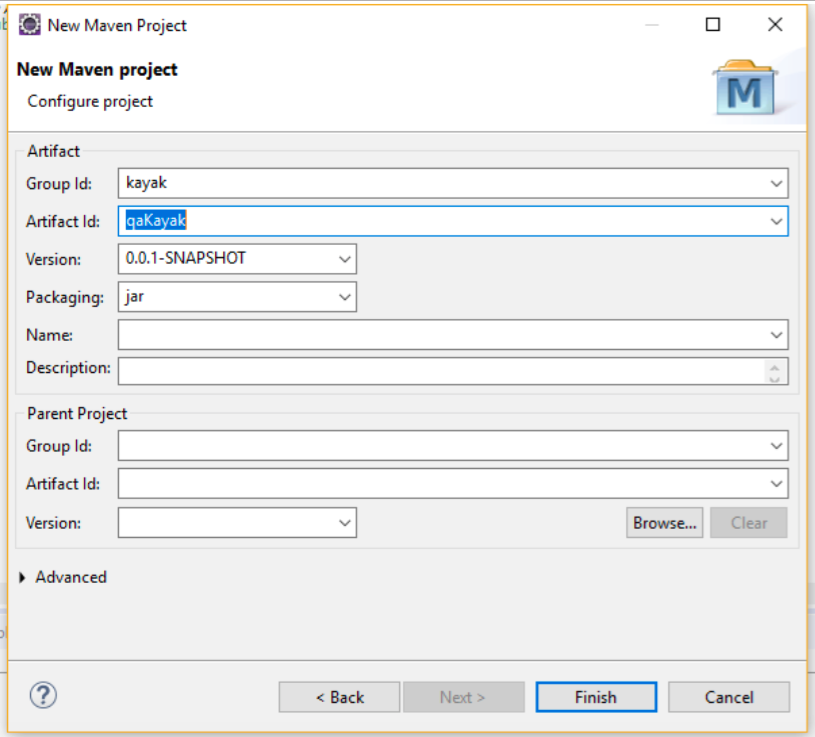
Maven Project
- Create a Maven project in Eclipse
- Click on New maven Project and Complete creating the Maven Project
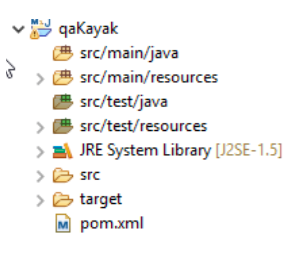
- Once above step is completed, you will see the following default structure
Configure Project Dependencies in pom.xml
- Add dependency for Selenium
<dependency>
<groupId>org.seleniumhq.selenium</groupId> <artifactId>selenium-java</artifactId> <version>3.141.59</version>
</dependency>
- Add dependencies for Cucumber
<groupId>info.cukes</groupId>
<artifactId>cucumber-java</artifactId>
<version>1.2.5</version>
</dependency>
<dependency>
<groupId>info.cukes</groupId> <artifactId>cucumber-junit</artifactId> <version>1.2.5</version> <scope>test</scope>
</dependency>
<dependency>
<groupId>info.cukes</groupId> <artifactId>cucumber-java</artifactId> <version>1.2.5</version>
</dependency>
<dependency>
<groupId>junit</groupId>
<artifactId>junit</artifactId>
<version>4.12</version>
<scope>test</scope>
</dependency>
Create the following packages
- Features
- Steps
- Driver
- POM
- Runner
Create the following Classes
- Runner – This will have the Glue Code to point to Features and Steps and Run the tests
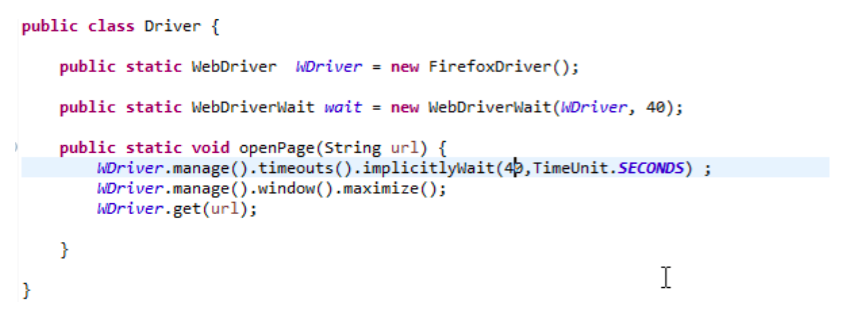
- Driver – This will have the call to the Web Driver
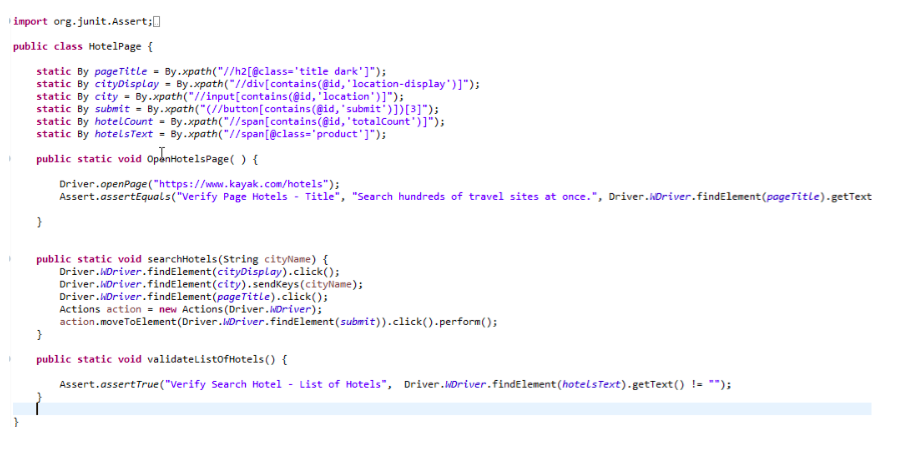
- HotelsPage – This will have the selectors to scrape the Kayak Search Hotels Page and the function calls needed
Create Feature Files
- Create a File with extension feature in Features Folder
Run the Tests: Right click on Runner.Java and run it as a junit Test
Results are generated
- Check Target/Cucumber for generated report in html format
Done.